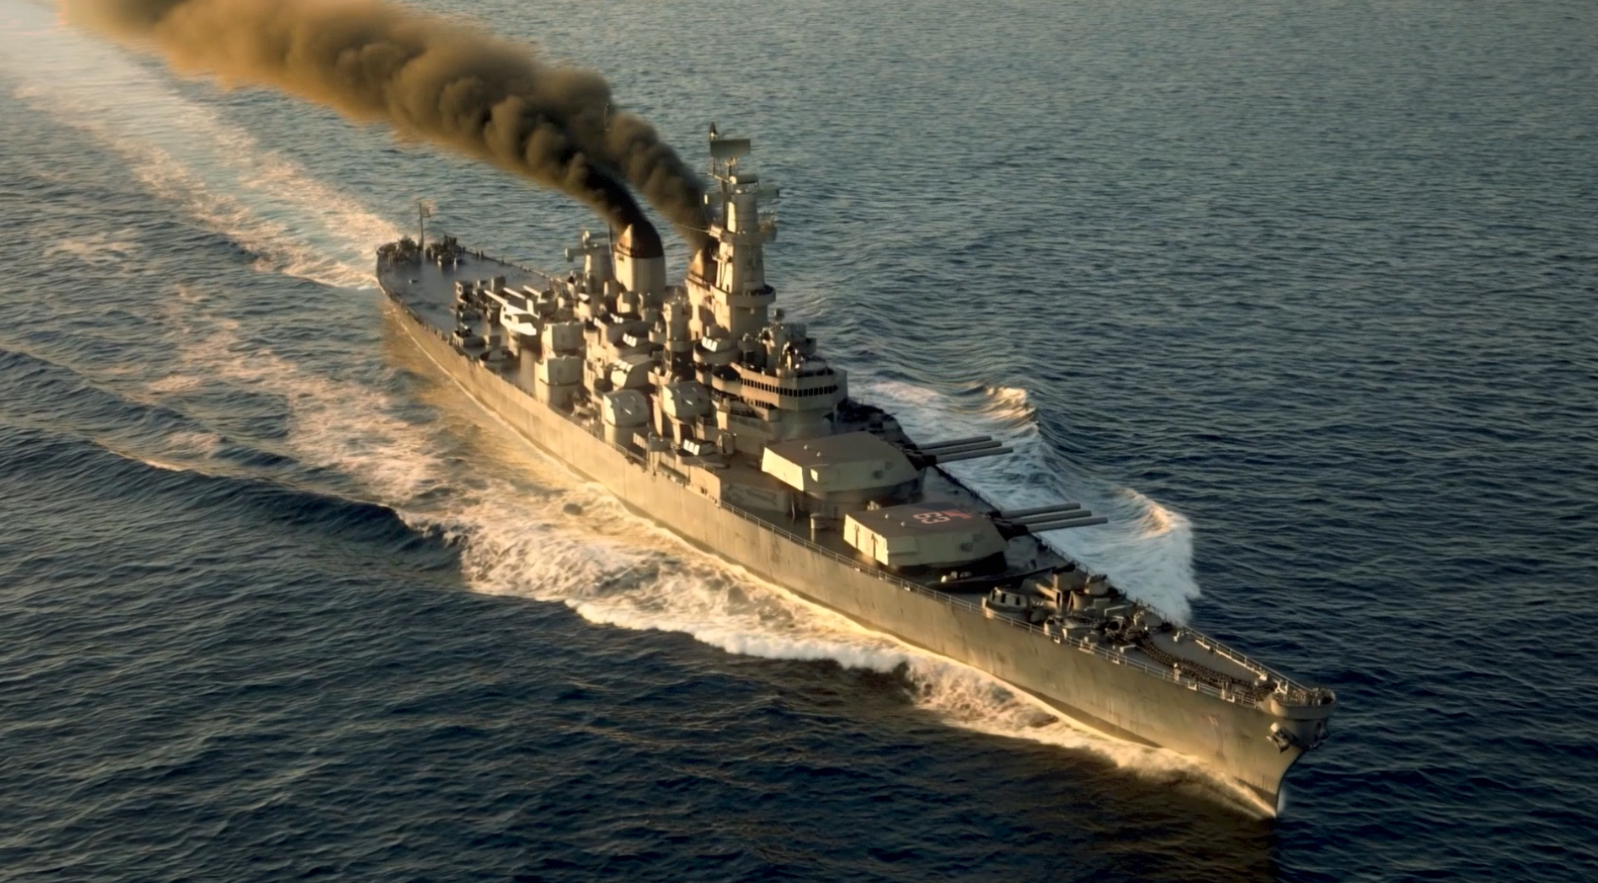
From Houdini to Gen AI: How I Rendered a Film-Grade USS Missouri Ocean Shot in Under 24 Hours
We’ve all been there. A brief comes in for a film or TV project requiring a massive, high-detail ocean shot—in this case, the legendary USS Missouri (BB-63) cutting through the water.
Normally, this is the cue for your workstation to melt. You’re looking at heavy FLIP fluid simulations for the ocean, secondary whitewater/foam simulations, and Pyro sims for the diesel smoke chugging out of the funnels. It’s a process that can easily eat up days of setup, caching, and rendering.
For this project, I decided to test a different hypothesis: Can Generative AI replace heavy Houdini simulations for quick, production-ready rushes while maintaining absolute camera and animation control?
The short answer is yes. But the secret isn’t just writing a clever prompt, it’s how you prep your 3D assets to act as the ultimate control rig. Here is how I went from a raw 3D model to a finished, color-graded shot in just one day.
1. The Strategy: 3D as the Ultimate Guide
In film and TV, camera direction and object animation are non-negotiable. “Garbage in, garbage out” is the golden rule of AI. If you feed an AI video generator a loose, low-res viewport flipbook, the AI has to guess too much, resulting in warping and boiling.
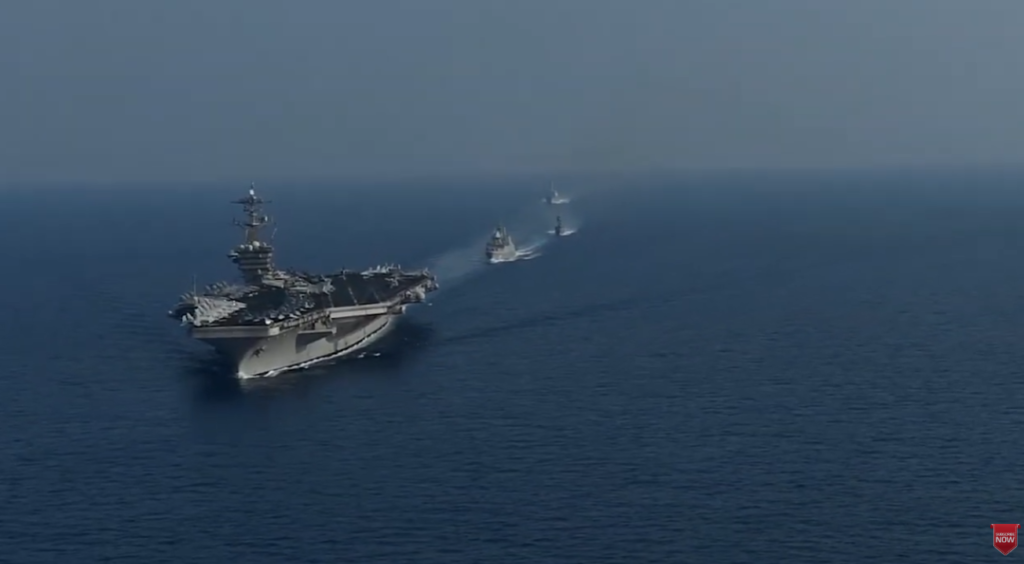
I needed a rock-solid reference video. I decided to frame the shot as a high-altitude aerial photo-op, the kind navies use to showcase their fleets (a composition I actually got to know intimately during my own navy days).
To give the AI the best possible guide, I opted for a semi-full Karma render in Houdini (with lighting and textures, but absolutely zero simulation elements).
The Houdini Prep & The “Reflection Grid” Trick
I loaded up the USS Missouri model, adapted its OBJ textures for Houdini’s Karma renderer, and animated a sweeping aerial camera path. I also added some subtle, realistic movement, animating the A and B gun turrets rotating slightly as the ship cruised forward.
However, rendering a ship on black space doesn’t work for AI. I needed to establish lighting and reflections:
- The Reflection Problem: I lit the scene to look like late afternoon with warm, golden-hour sunlight. But without water, the ship’s metallic hull looked flat. I placed a ground grid directly beneath the ship and applied a material that mimicked the reflective properties of ocean water. Immediately, the warm sun bounced beautifully off the hull.
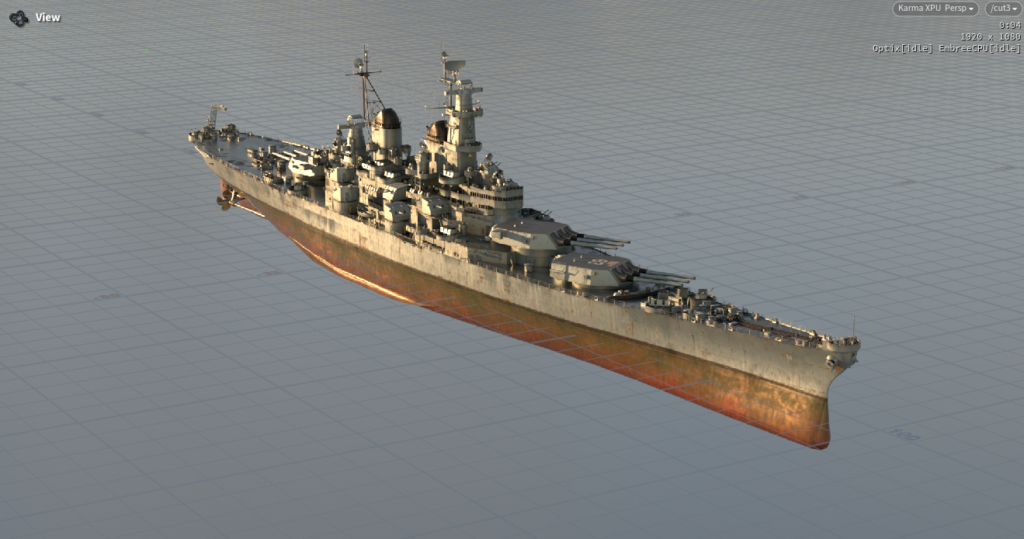
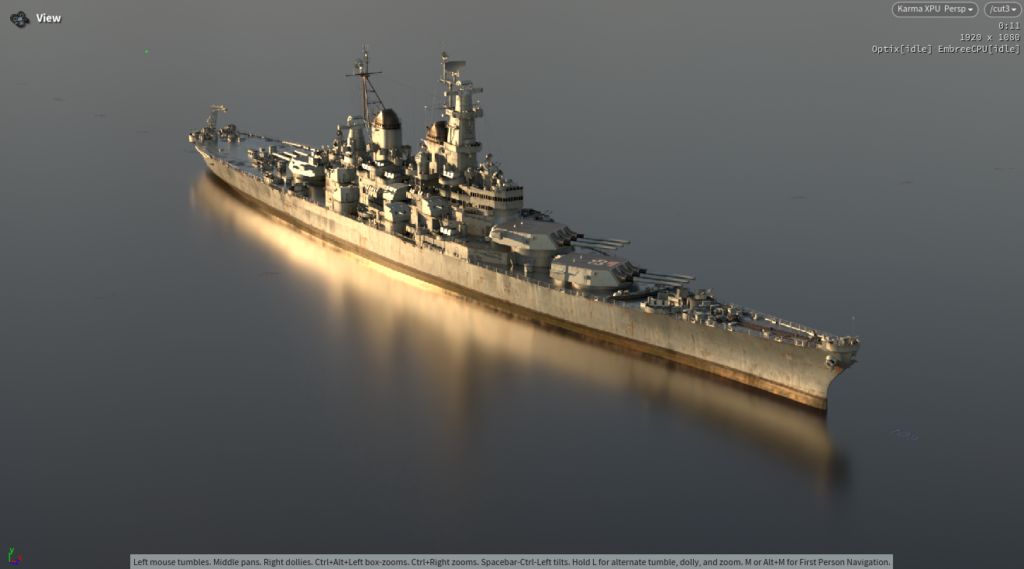
- The Motion Problem: With a featureless reflective grid, the moving ship looked completely stationary as the camera tracked it. To give the camera (and the AI) a sense of speed, I needed a visual reference.
- The Solution: I duplicated the grid, turned it into a wireframe white grid, and overlaid it. To prevent these white grid lines from ruining my beautiful hull reflections, I adjusted the geometry render settings so the wireframe grid was only visible to primary rays.
The result? Perfect hull reflections, a clear grid to register relative motion, and a clean 1080p render sequence ready for the AI pipeline.
2. Setting the Stage: The First Frame (FF)
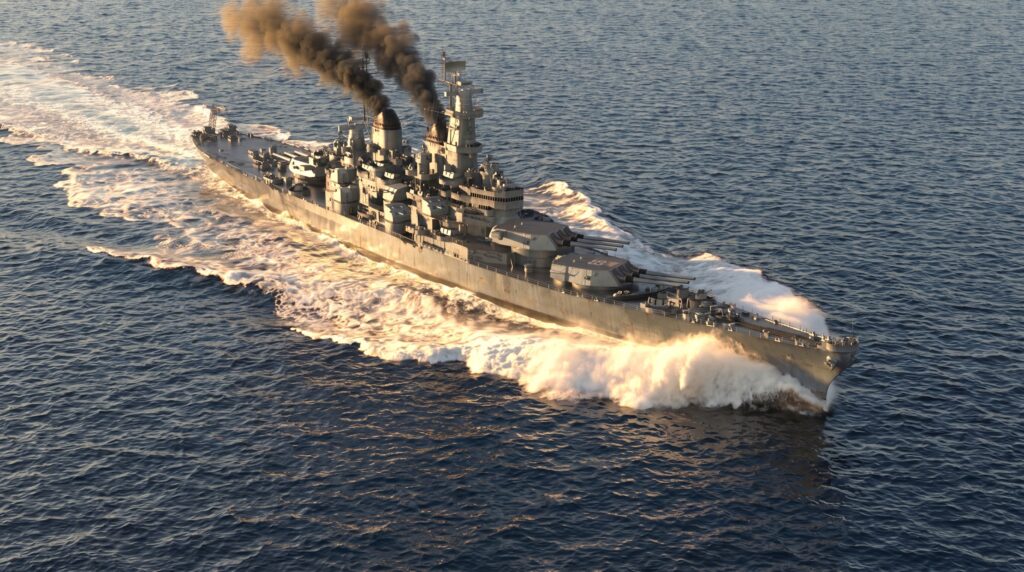
Because the first frame dictates the visual quality of the entire video, I needed to replace our placeholder grid with actual, high-fidelity ocean waves, foam, and smoke.
Using my rendered first frame as an image prompt, I wrote a highly specific control prompt to dictate the physics of the scene:
“Change grid floor to ocean. Give the bow wave and wake solid, clearly visible whitewater — a defined white bow wave breaking at the hull with decent foam volume, and a wake trailing behind the ship with an appropriate amount of bright, clearly visible whitewater, picking up warm tones from the light where it catches the foam. Keep this consistent with a heavy displacement-hull warship at moderate cruising speed, not a high-speed planing wake. Foam edges should be organic and irregular, breaking up naturally further behind the ship.
Add two separate columns of dark grey-black smoke, one rising independently from each of the two black funnels, both blown by the same wind, streaming backward at the same consistent angle, never merging into one plume, with clear open space between them — the smoke’s edges may pick up a subtle warm rim from the low sun. Follow the exact light direction and warmth already present in the source image.”
Iteration & Tweaking
The first output generated a wake that was way too heavy—it looked like the battleship was trying to drag race. I quickly re-prompted to scale it back:
“Make the smoke columns trail longer towards the back of the ship. 20% less white water.”
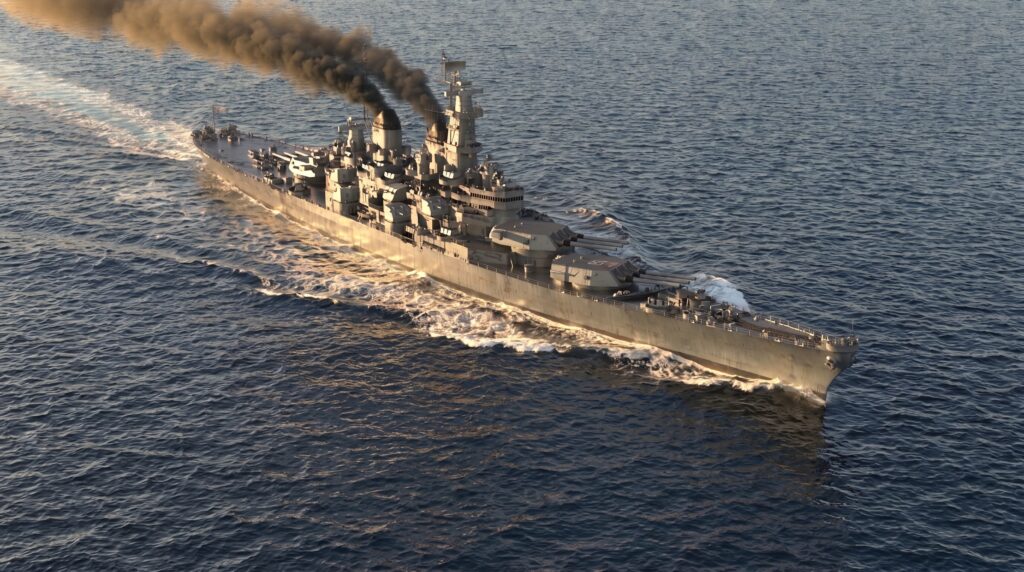
This hit the absolute sweet spot.
3. Bringing It to Life in Kling Omni
With my master assets ready—the perfect First Frame (FF) and my 1080p Houdini reference video—I loaded them into Kling Omni.
I ran the generation using the reference video for spatial/motion information and the image as the exact starting frame, using the prompt:
“Use @Image as exact first frame. Use @Video as reference video and spatial information. The bow wave and wake should have solid, clearly visible whitewater.”
The Output
The results were incredibly impressive. The water wake looked highly realistic, the lighting remained perfectly consistent as the camera moved, and the dual columns of funnel smoke drifted naturally in the wind.
Fixing the Details in Post
As expected with current Gen AI, fine details like the “63” hull numbering and the American flag printed on the turret had some slight consistency issues over time. However, because Kling followed my 3D reference video so precisely, fixing this was a breeze.
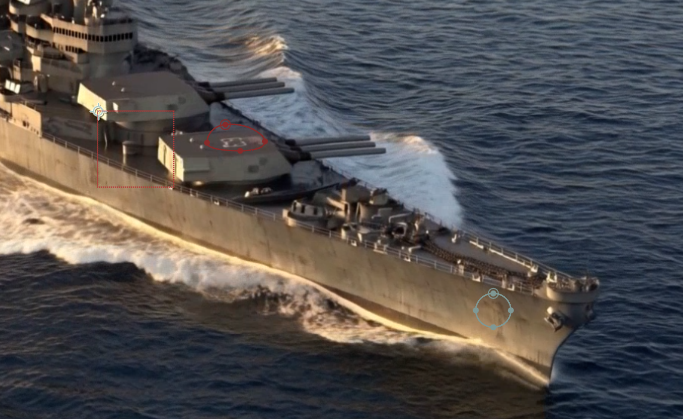
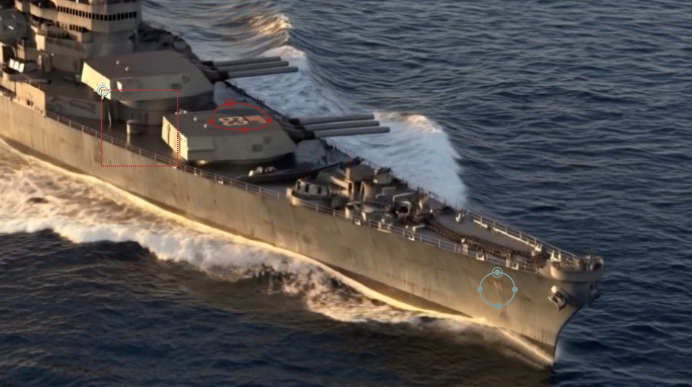
I took the original high-res clean render from Houdini and simply composited the stable decals, flag, and hull numbers right back over the AI video in post. Add a quick color grade, and the shot was complete.
Bonus Test: What Happens When You Push the First Frame Parameters?
To really test how much influence the First Frame (FF) has over the video engine, I ran a quick experiment. I took the earlier iteration of our first frame—the one with the much heavier, highly aggressive bow wave—and ran it through Kling Omni using the exact same prompt and 3D reference video.
The result was a textbook demonstration of how AI interprets initial input data:
- 1:1 Motion & Physics Translation: The AI immediately locked onto the heavier wake from frame one and maintained that high-energy, violent water displacement across the entire camera move.
- Zero Loss in Camera Alignment: Despite the drastic change in water volume and foam density, the model followed the 3D reference video’s spatial motion just as flawlessly as the calmer version.
The Resulting Shot
Here is the high-energy output:
Conclusion: The “First Frame” Controller Paradigm
This project completely shifted how I view the integration of 3D and Generative AI. If you need to deliver high-quality, complex shots on a tight deadline, here are my biggest takeaways from this experiment:
- A Film-Grade Alternative for Quick Rushes: For elements that typically demand heavy, time-consuming simulations in Houdini, Gen AI is a massive time-saver. Going from a raw 3D model to a finished, client-ready shot in under 24 hours is a massive win for tight production schedules.
- The First Frame is Your “Houdini Parameter Slider”: The most crucial realization was that when you pair a First Frame (FF) with a reference video, the FF acts as your physical controller for the “simulation.” If your first frame has high wake and heavy foam, the AI maintains that high-intensity motion throughout the shot. If you want a calmer sea, you dial it back in the first frame. Your control over that initial image is everything.
- Keep Your Video Prompts Simple: When it’s time to prompt Kling, less is more. You don’t need to write a massive block of text describing the scene’s physics. Because you used a high-quality reference video and a detailed first frame, the spatial information, motion, and visual details are already completely baked into your inputs. The AI just needs a simple nudge to do its job.
- The Power of the Semi-Full Render: This was my first time testing a semi-full render (complete with lighting, textures, and reflection grids, minus the actual simulations) as an AI input, rather than a flat viewport flipbook. The experiment proved that feeding the AI proper lighting and surface reflection data is the key to unlocking true, production-grade output.
By letting Houdini handle the rigid composition, perspective, and lighting, and letting Gen AI handle the chaotic, computationally expensive fluid dynamics, you get the absolute best of both worlds.