
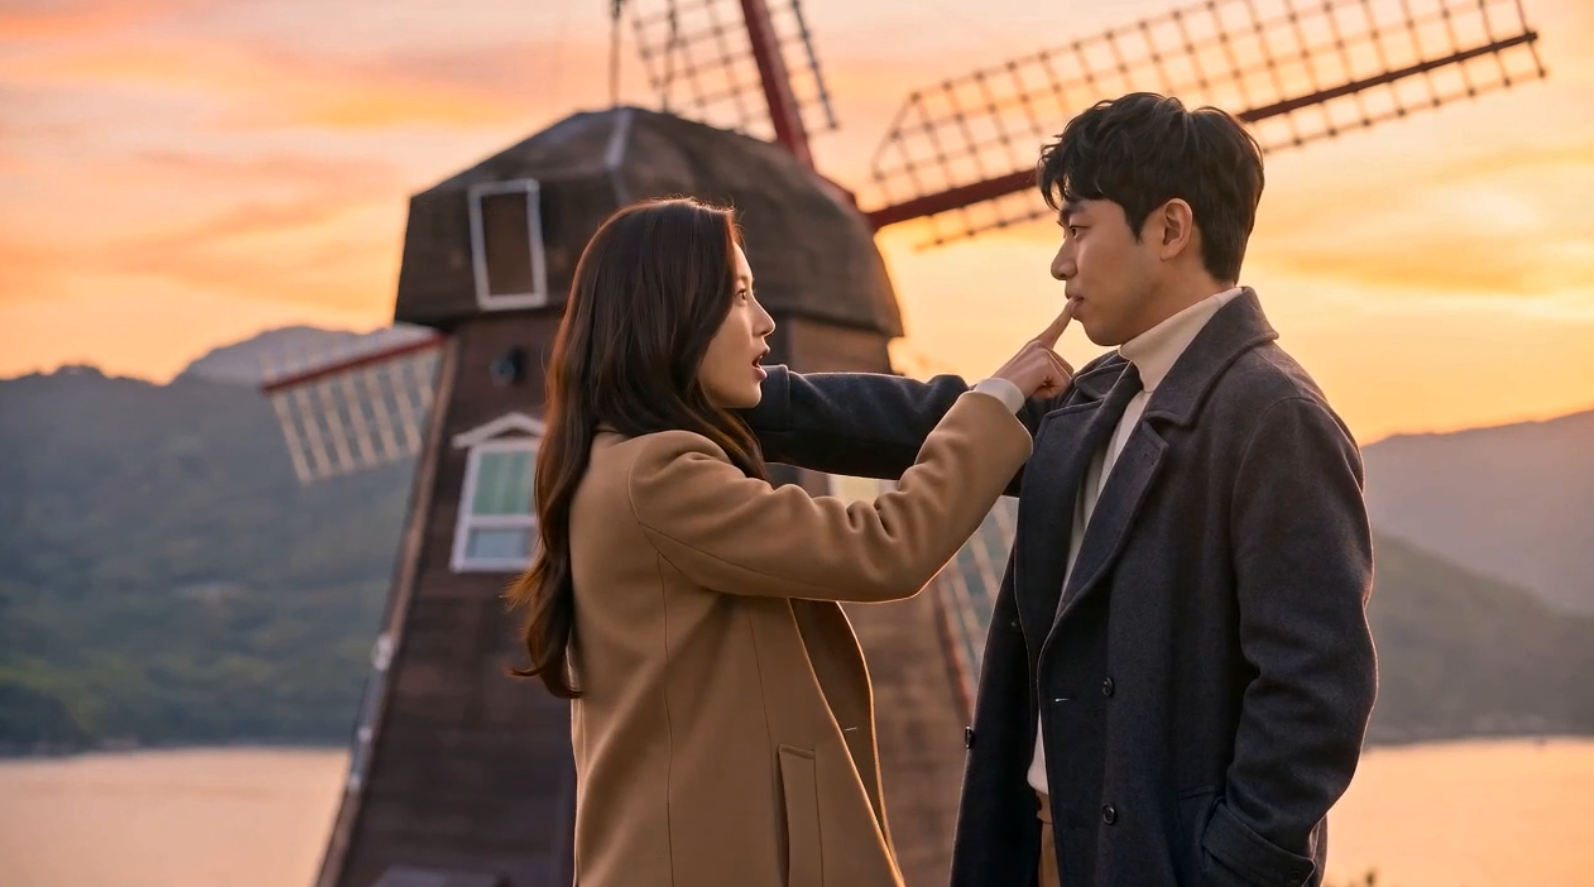
I Turned Myself Into a K-Drama Lead and Shot a Scene at Windy Hill: Here’s the Full AI Pipeline
I wanted to see how far I could push a fully AI-generated K-drama scene end to end: myself as the male lead, a fictional female lead, shot on location at a real place in Korea, with a full multi-shot sequence complete with a twist ending. No cameras, no actors, no location scout, just Nano Banana Pro for stills and Seedance 2.0 for video.
Three things I specifically wanted to test:
- Hands-on with multi-shot scene generation. Can one prompt actually direct a full mini-scene with multiple camera angles and a cut structure, instead of just one continuous clip?
- Character consistency across a single generation. Do the same two people stay recognizably them across five different camera angles in one take?
- Scene/location consistency across a single generation. Does the real-world location (windmill, boardwalk, ocean) hold together geometrically across cuts, instead of drifting?
Here’s the whole process, warts and all.
Step 1: Building the characters
First stop was character sheets, the reference material everything downstream depends on.
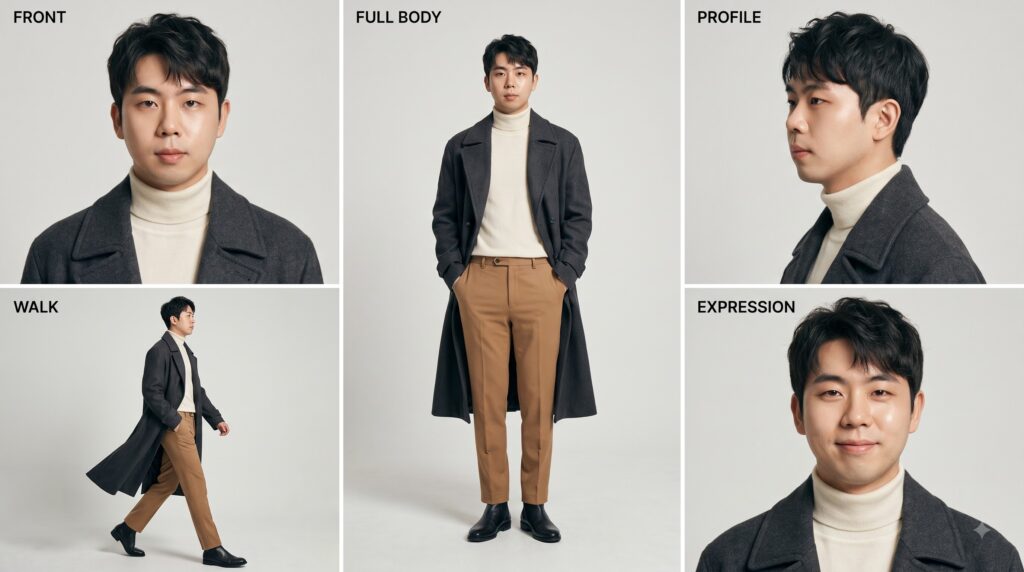
For the male lead, I used my own photo as the identity reference and asked Nano Banana Pro to generate a 5-panel character sheet: front, 3/4 profile, full body, walking pose, and a close-up expression. The trick that mattered most here was locking the wardrobe explicitly. My first pass let the model pick between two outfit options, and it happily gave me a different coat in every panel. Naming the exact garments (charcoal wool trench, cream turtleneck, camel trousers) and repeating the “identical in every panel” instruction twice fixed that.
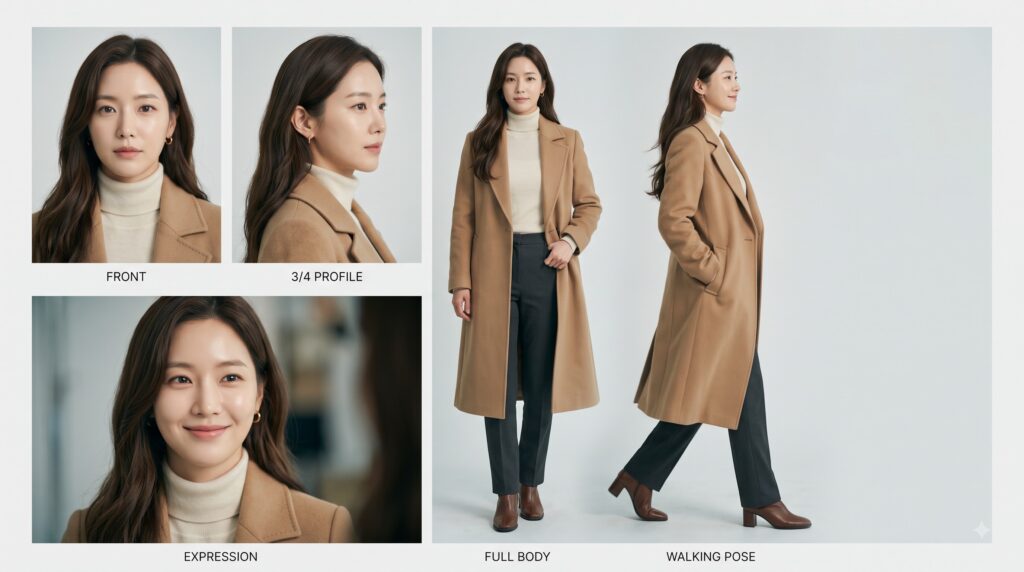
For the female lead, since there was no reference photo, I had to be much more explicit about facial features up front (face shape, eye size, hair texture) to keep her recognizable across the same 5-panel layout, and matched her wardrobe language to his (same palette: charcoal, cream, camel) so the two of them would visually belong in the same show once composited together.
Step 2: Picking the location
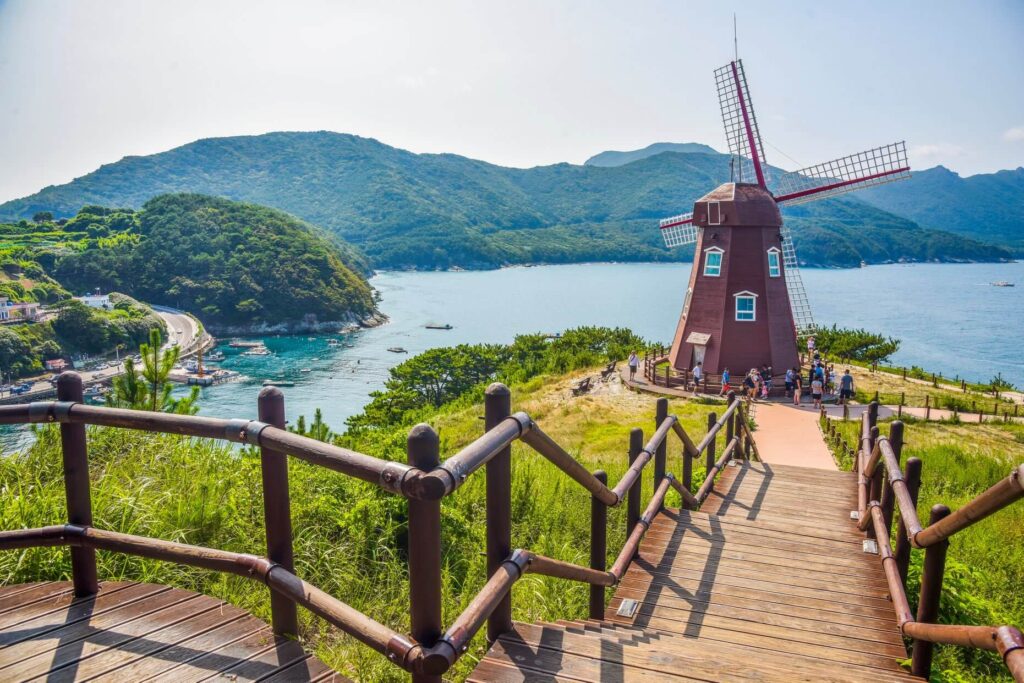
For the setting, I picked Windy Hill (바람의 언덕) in Geoje, a real, famous K-drama filming location with an iconic wooden windmill on a grassy cliff overlooking the sea. Rather than generating a location from scratch, I found an existing photo of the spot online and used that directly as my base plate. No location reference sheet needed, since the real photo already had the exact angle, boardwalk, and composition I wanted to build the scene around.
Step 3: Compositing the couple into the scene
With character sheets and a clean location plate in hand, next was compositing: placing both characters into the real photo, at a specific spot I marked with a red X on the boardwalk, facing each other, relit to sunset (the original photo was shot at midday), with the actual tourists in the background removed.

Step 4: Scripting the multi-shot sequence
This is where objective #1 actually got tested. I’d seen a bunch of people on social media doing these single-generation, multi-shot AI video sequences, and I wanted to try it out myself rather than falling back on the more obvious route of generating five separate clips and stitching them together in an editor. Turns out Seedance 2.0 supports writing an entire multi-shot sequence as a single timestamped prompt, with actual hard cuts between camera angles, inside one continuous generation.
The format that worked was structuring it like an actual shooting script:
[Action Sequence]
SHOT 1 (0:00–0:04) ...
SHOT 2 (0:04–0:07) ...
SHOT 3 (0:07–0:10) ...
SHOT 4 (0:10–0:13) ...
SHOT 5 (0:13–0:15) ...

[Production Brief]
References: @Image 1 = location, @Image 2 = male character, @Image 3 = female character...
Continuity: [what stays fixed across every shot]
Forbidden: [everything that kept going wrong, listed explicitly]
The story beats: wide establishing shot of the couple at the windmill, slow-motion over-the-shoulder shots building romantic tension, a hard tonal break where the guy ruins the mood with a goofy “거제 야호!” instead of something romantic, then the girl shushing him with a finger to his lips while telling him to shut up.
Step 5: The debugging loop
This is where most of the actual learning happened, and honestly where objectives #2 and #3 got stress-tested the hardest. Roughly in the order I hit them:
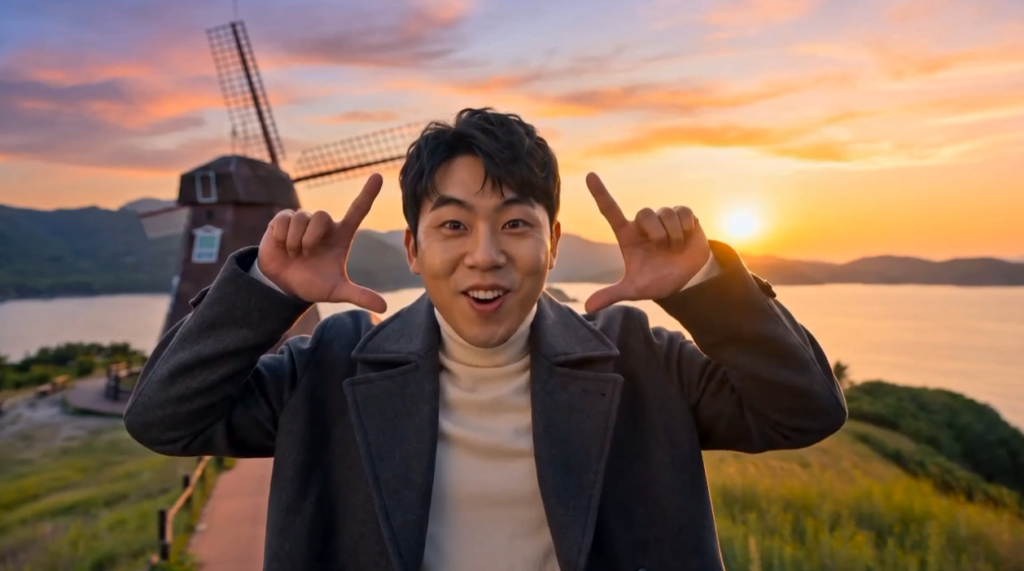
- Windmill ending up behind him when it shouldn’t have. The shot was supposed to face the male lead with no windmill behind him, but in one iteration his orientation shifted slightly, the camera angle followed that shift since it was tied to his POV, and the windmill ended up directly behind him as a result. Worth noting the scene environment itself (the windmill, the location) stayed pretty consistent throughout. This was more a knock-on effect of a character’s orientation changing than the environment drifting on its own.
- The 180-degree rule, the hard way. My over-the-shoulder shots initially switched which shoulder the camera sat behind mid-sequence, a continuity break any film editor would catch instantly. Had to explicitly pin one camera side per shot and state that both shots stay on the same side of the axis between the two characters.
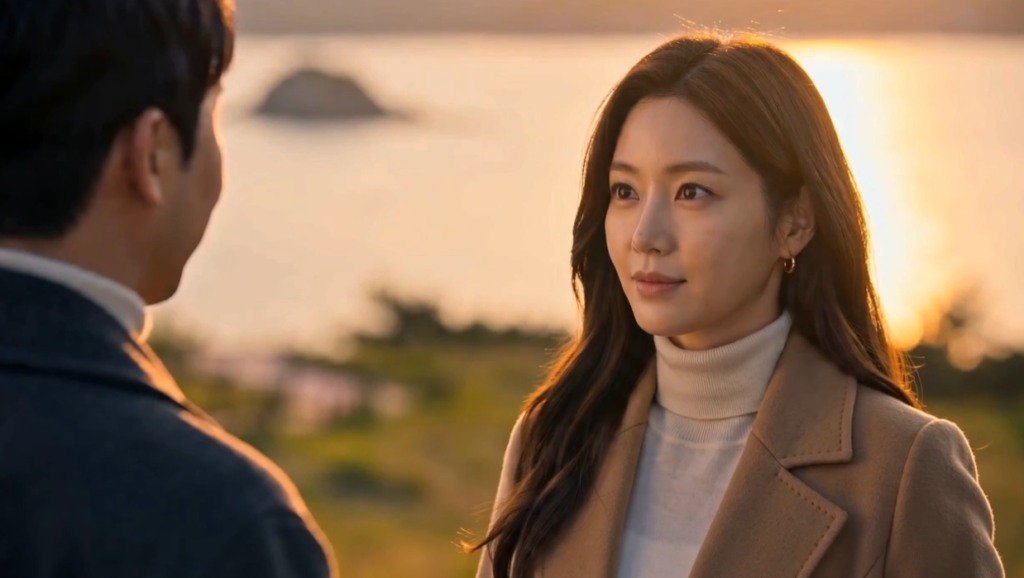
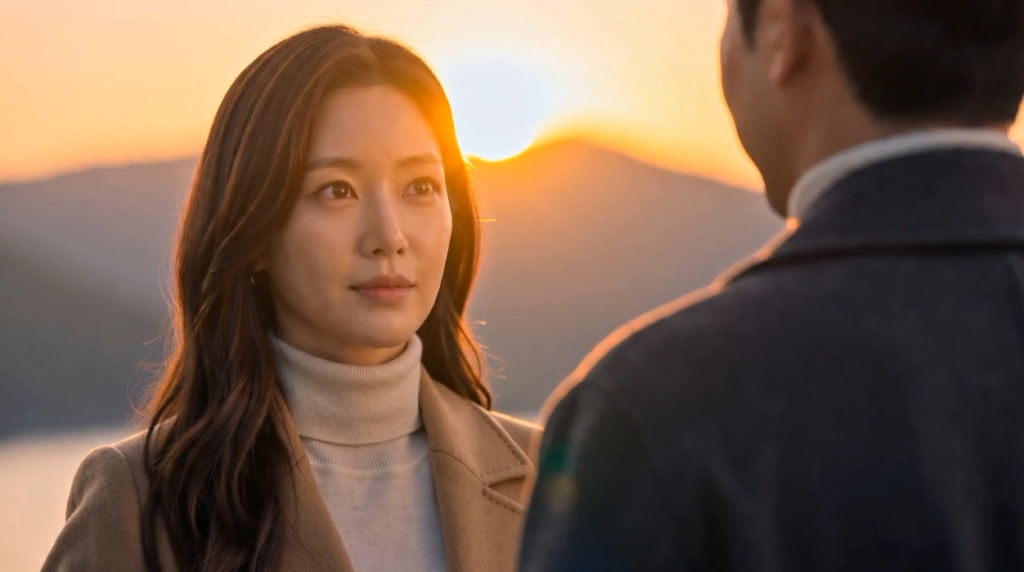
- Impossible physics. The sun showed up in both reverse-angle shots of the conversation, which can’t happen if two people are facing each other and one shot faces the sun. Had to explicitly state the sun must not appear in the reverse angle at all, and describe that character as lit by ambient reflected light instead.
- Content moderation. My original twist had her slapping him. That got flagged for violating community guidelines, likely because the face-strike read as depicting violence. Pivoted to her shushing him with a finger to his lips instead, which kept the comedic beat but read as playful rather than aggressive.
- The gesture that never quite landed. This was the toughest one. I wanted him to do a deliberately uncool “inverted peace sign” (palm up, fingers drooping down) while shouting “거제 야호!” Every attempt at describing this in text produced something else: first a two-handed hand sign 7 gesture, then a flat open palm. Eventually I fed it a reference image of an actual hand doing a similar V-sign-toward-camera pose to lock the shape, which helped the arm position but still never quite nailed the exact inverted orientation.
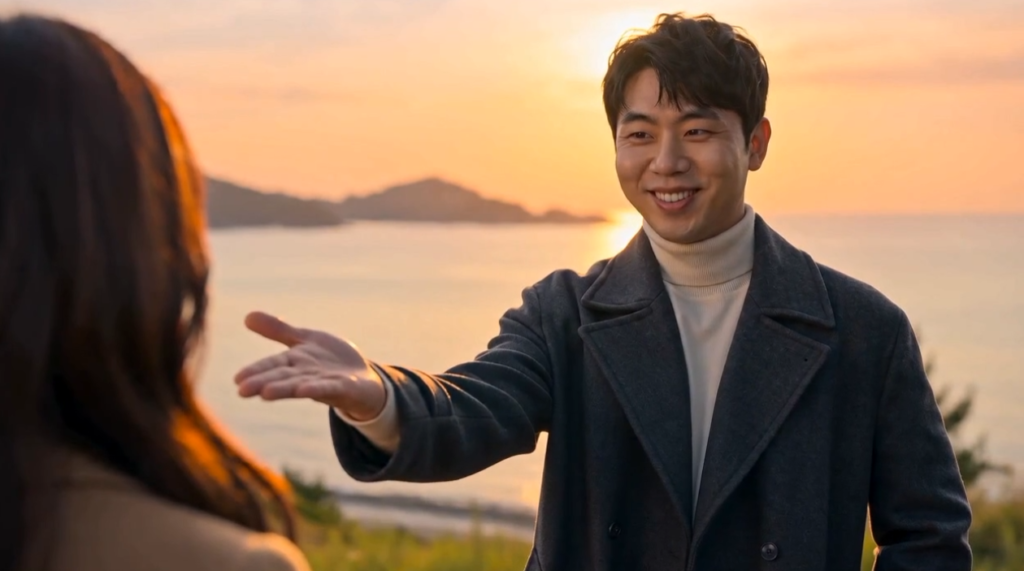
The result (and where I landed)
I never did get the exact “inverted V, palm up” gesture I originally wanted. What came out is his arm stretched out parallel to the ground, an open V with his fingers, but palm facing down instead of up. I decided to just roll with it: canon is now that this guy is some outdated ajusshi who got the trend slightly wrong, doing an irregular, inverted peace sign rather than whatever aegyo gesture he thought he was doing. Honestly it still lands as comedic, just for a slightly different reason than planned.
Reflections
The biggest win here was objective #1: doing the whole scene as one multi-shot generation instead of five separate clips. It’s faster (no need to generate first/last frames for every individual shot), and continuity comes almost for free. Because the whole sequence is one generation, the same action and energy carries through from shot to shot in a way that’s hard to fake when you’re stitching independently generated clips together in an editor.
But that same strength is also the ceiling. Complex, specific physical actions, like the inverted peace sign, seem to be a case the model just wasn’t strongly “trained” on as a recognizable shape, no matter how precisely I described the finger positions and wrist rotation. A plain, ordinary peace sign would almost certainly have worked first try. For genuinely unusual or precise physical actions like this, I think shot-by-shot generation with first/last frame control, or an actual reference video of the real motion, would give a lot more control than trying to describe an uncommon gesture into existence through text alone.
So: multi-shot-in-one-generation for anything where flow and continuity matter more than pinpoint precision on a specific action. Shot-by-shot with strong frame/video references for anything where one very particular physical detail has to land exactly right.